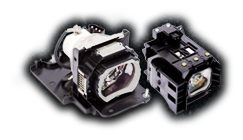
How to Find the Lamp Hours, Extend the Lamp Life, and Reset the Lamp Hours of the BenQ W1070 and W1080ST Projectors

Every time you replace your BenQ projector lamp, you must reset the lamp hour timer to zero. That way it can count upwards and lets you see the number of hours the lamp is used. To find out the lamp hours, follow these steps on the on-screen menu.
You need your projector turned on and warmed up, so you can view the image and have access to the on-screen menu.

  1. Press the [MENU/EXIT] button and then press < > (left and right arrows) until the System Setup: Advanced menu is highlighted. This will display the options within this sub-menu.
  2. Press the ▼to highlight the Lamp Settings in the left-hand navigation, and then press [MODE/ENTER]. This will display the Lamp Settings options.
  3. The lamp hours and additional information will be displayed under the Equivalent Lamp Hour tab.


Lamp Power Settings

There are 2 lamp power settings on your projector, which will extend the life of your lamp. Additionally, they will determine the level of brightness and lamp life with Economic and SmartEco modes.

Selecting the Economic mode will reduce system noise and power consumption by 30%, which will reduce brightness by 30% and may add 30% of life to your lamp.

Selecting SmartEco will reduce system noise and power consumption by 70%. This may add 70% of life to your lamp and reduce the brightness by 70%.

To activate Eco mode or SmartEco mode, press the [MENU/EXIT] button and then the < > arrows to navigate to the System Setup: Advanced menu. Next, select the Lamps Settings and then Lamp Power. Press the [MODE/ENTER] button and the Lamp Power options will be displayed. Press the ▲▼ arrows to navigate to the desired mode and then press [MODE/ENTER] to confirm your selection.

In the end, it’s up to you to decide which eco mode is better for your lamp and projector.

Another feature to consider to save the lamp life and protect your projector is the Auto Off setting. This will shut the projector off if there is no input source detected for a selected amount of time. The increments you can set are 5 – 30 minutes. For example, if you selected 5 minutes, then if there is no input source detected after 5 minutes, the projector will auto-shutoff.


The 3 Reminder Warnings

The first warning pops up “NOTICE: Order Replacement Lamp” if you exceed the Normal mode hours determined by BenQ, then you can select OK. If your projector is running on Normal mode, then you need to purchase a new lamp and replace it as soon as possible.

The 2nd warning pops up if you exceed the Eco Mode hours determined by BenQ, then you can select OK. If your projector is running in Eco mode, then you need to purchase a new lamp and replace it as soon as possible.

The 3rd warning pops up if you exceed what BenQ determines as the maximum number of hours under any given mode. Select the OK button. You must replace the projector lamp, so the projector can operate normally. The projector may auto-shut off once it reaches max hours. The only steps to resume functionality are to remove the existing lamp, replace it with a new lamp, and reset the lamp timer. Replacing the old lamp with a new lamp will give you a short period of time to quickly turn on the projector, go to the Menu, and reset the lamp timer.


Resetting the Lamp Timer

After replacing the lamp, you need to reset the lamp hours to zero.  Technically, you can reset the hours on any lamp at any time. Resetting the lamp hours will turn off the Lamp Warning message on the on-screen menu once your existing lamp has reached its maximum hours.

First, make sure the lamp access panel door is attached and closed. The screw needs to be tightened but not over-tightened.

Then connect the power cord to the projector and turn on the projector by using the standby/power button.

After the start-up logo appears, press the [MENU/EXIT] button and then the < > (left and right arrows) until you select the System Setup: Advanced menu. This will display the sub-menu options.

Next, press the ▼ arrow to highlight the Lamp Settings and press the [MODE/ENTER] button to display the Lamp Settings sub-menu.

Lastly, highlight the Reset Lamp Timer using your arrow keys and press [MODE/ENTER]. A warning message will appear asking if you want to reset the lamp timer. Highlight the Reset using the up and down arrows and press [MODE/ENTER]. The lamp time will reset to “0”.
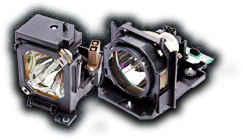
Epson PowerLite Home Cinema 8345: Checking Lamp Hours and Resetting the Lamp Hours

Many Epson projectors have a few quirks when it comes to lamp hours and this projector is no different. Find out the quirk below, so you don’t get caught wondering why your lamp hours are not counting after performing the reset.


First, to find out the lamp usage hours for the Epson HC8345, you will need to access the on-screen menu. Make sure your projector is turned on and you have an image displaying on your screen.

  1. Press the [Menu] button on the remote control.
  2. Navigate using your remote control and find the [Info] menu.
  3. In the [Info] menu, there is a section called [Lamp Hours]. It will show the lamp hours on this screen.


In the manual, it says to replace the lamp when you notice these things:

  1. The image is too dark for your viewing enjoyment.
  2. The LED lamp light indicator flashes red at ½ second intervals.
  3. The “Replace the lamp” message appears on the screen as you are watching.


After replacing the lamp, you will want to reset the lamp usage hours.


Plug in the projector, turn on the main power switch on the back of the projector, and then press the power button. Once the projector has warmed up and you have the projected image on your screen:

  1. Press the [Menu] button on your projector or remote control.
  2. Use the navigation button on your remote (or projector) to scroll to and open the [Reset] menu.
  3. Once in the [Reset] menu, navigate to and select [Reset Lamp Hours].
  4. Once the confirmation pop-up appears, highlight the [Yes] and press the [Enter] button.
  5. It will confirm the hours are reset and you can now exit by pressing the [Menu] button.


The Quirk: The lamp usage timer will show 0H or zero hours once it resets, however, it will remain at 0H and will not appear to be counting hours for the first 10 hours or so. Don’t worry, after it’s reached more than 10H, it will start counting the hours and show the total. Don’t ask us why Epson programmed the timer to function this way. Keep this quirk in mind, since many people think that the lamp is broken, or something is not working when in fact this is perfectly normal.


How to Check the Life of Your Projector Lamp

Written by Correy Pelletier

There are thirteen main companies that sell projectors and each projector has a PDF manual easily found on the internet. You will first need to find the one that goes with your model and brand. If you own a specific brand like Optoma, then the menu navigation should be very similar regardless of the projector model. Listed is a popular projector model for each of these thirteen brands and finding the lamp hours in the on-screen menu is similar if it shares the same brand.


Optoma

Projector Model: TX775 

  1. Press on the Menu button to open the image menu.
  2. Then use the left-right cursor button and proceed to the Management menu.
  3. Use the up-down cursor button to move down to status.
  4. Then use the right cursor button or the Enter button to enter the Status menu. The “Lamp Hours” lets you see how many lamp hours your lamp has used.


BENQ

Projector Model: MS521 

This projector uses Economic, SmartEco, and LampSave to save and elongate the amount of lamp hours.

  1. Press the Menu/Exit button and then press the left-right arrow buttons until the System Setup: Advanced menu is highlighted.
  2. Use the down arrow to highlight the lamp settings and press the Mode/Enter button. The lamp setting page should display.
  3. Here you will see the equivalent lamp information, which should show the number of hours the lamp was used.
  4. To leave the menu, press the Menu/Exit button.

*You can also use the INFORMATION menu to find lamp hour information.


Epson

Projector Model: PowerLite 73c

  1. Press on the Menu button and you will see the main menu.
  2. Use the Enter button to select About. Now you can see lamp usage information and other advanced display settings on the right.
  3. To exit, press the Esc button or Menu button.


NEC

Projector Model: PA722X

  1. Press the ENTER button on the remote control or on the projector.
  2. Use the left and right arrow buttons to move between the tabs.
  3. Find INFO. and use the up and down buttons to select Usage Time. This will show you the Lamp Life Remaining and Lamp Hours Used.


DELL

Projector Model: 7609WU

  1. Use the remote or projector control buttons to press the Menu button.
  2. Use the left and right arrows to select Lamp and press the Enter button. When an item or tab is selected it will turn dark blue.
  3. Then use the up and down arrows to select the setting you want.
  4. Use the left and right arrows to switch from Yes or No or On or Off in the options.
  5. Select the Exit Menu option to exit the menu and return to the main menu.


Hitachi

Projector Model: CP-X445

  1. Press the Menu button either on the remote or on top of the projector.
  2. Use the up and down arrows to maneuver the menu and select Option.
  3. Then use the left and right arrows to change the item’s settings on the right.
  4. Find Lamp Time, which will show you the number of hours your lamp was used since the last reset.


Infocus

Projector Model: IN102

  1. Press the Menu/Exit button and then use the left and right arrows until the System Setup: Advanced menu is highlighted.
  2. Press the down arrow to go to Lamp Settings and press the Mode/Enter button. The Lamp Settings page will appear.
  3. This will show the Equivalent lamp hour information.
  4. To leave the menu, press the Menu/Exit button.

*You can also use the INFORMATION menu to get the lamp hour information.


JVC

Projector Model: LX-FH50

  1. Press the MENU button.
  2. Use the arrow buttons to go to Information or System Setup: Advanced, then Lamp Settings and lastly, Lamp Time.
  3. The Lamp Time information will appear.
  4. Press the MENU button to exit.


Mitsubishi

Projector Model: HC4000

  1. Press the Menu button.
  2. Use the left and right buttons to move to the Information tab.
  3. Under Lamp Time, it shows the number of hours the lamp was used.

*If the lamp hours are low, then it will show 0H or zero hours.


Viewsonic

Projector Model: PJ1172

  1. Press the Menu button on the remote or press the RESET button for three seconds to get to the LAMP TIME menu faster.
  2. Use the up and down arrow buttons to go to the Option menu.
  3. Under LAMP TIME, it shows the number of hours the lamp was used.


Acer

Projector Model: H7850

  1. Press the Menu button on the remote or projector.
  2. Use the up and down arrow buttons to scroll down to the Management Menu or icon of a projector with a lightning bolt above it.
  3. Under Lamp, it shows Lamp Hour Elapse or how long the lamp has been used in hours. 
  4. Press Lamp Reminding, if you want to be reminded before the lamp reaches thirty hours before the end of its life.


Sony

Projector Model: VPL-VW675ES

  1. Press the Menu button on the remote or on the projector.
  2. Use the up and down arrows to scroll down to the i icon or Information menu.
  3. Under Lamp Timer, it shows how many hours the lamp has been used.


Panasonic

Projector Model: PT-EX500U

  1. Press the Menu button on the remote.
  2. Use the up and down arrow button to scroll down to the information icon or the Information menu.
  3. Under Lamp Runtime, it shows how long the lamp has run over time.


Troubleshooting Tips When Replacing Your Lamp

Written by Correy Pelletier


Your bulb has blown or is dead; it’s time to replace it, but how?


Remove the old bulb and dispose of it properly.


Make sure when you put in a new bulb, you insert it firmly, but gently. Put it in as deep as possible. Once it’s in, press gently on the side where the connector is located to ensure the connection is solid. If the lamp is not fully inserted, it will not turn on.


Inside the module slot, you must tighten every screw that holds the lamp in place.


Close the lamp access panel door and if there’s a screw to keep it closed, make sure it’s tightened slowly. The projector will not turn on if the lamp access panel door is open or broken. There is a little button that is depressed when the door is shut. This button must be working properly for the projector to turn on.


If your projector has a removable filter, remove it and tap out the dust or use light suction. Similar to a furnace heater, if it is clogged or filled with dust the projector will not turn on to prevent overheating. Once you are done cleaning the filter, place it back in, and tighten the screw, if there is one.


Reset the lamp timer, some projectors have a lamp timer on the menu screen, while other projectors have a button configuration that must be completed before you can power it on. You can go to our installation page here to see the most common brands’ reset instructions: https://www.myprojectorlamps.com/lampinstall.html


Some projectors have an eco-mode and a normal mode. Sometimes, depending on the condition of your projector, it might perform better in normal mode rather than in eco mode.


Some projectors have a high-altitude function, which must stay on in order for the projector to power on.


Lastly, always replace your old lamp when you receive a new lamp. This is because your new lamp’s warranty starts right away, so use the warranty period effectively and test if the lamp is functioning well. Put it into your projector as soon as you receive it. If the lamp was damaged upon transport or you received the wrong lamp or you ordered the wrong lamp to begin with, then it might not work when you open the box and try to install it. You can also keep your old lamp even if it’s dim, it will make a good backup if the new lamp fails.

How to Check Your Lamp Hours and Reset the Lamp Hours for the NEC LT240, LT260, and LT220 Projectors

How to check the current lamp hours for your NEC LT220, LT240, or  LT260 projector and how to reset the projectors’ lamp hours. As a preventative measure, NEC designed a secret reset if you have surpassed the 1600-hour mark, so you don’t have to think twice about using your lamp too long.

Each of these NEC models will display a message that will tell you to replace your lamp once you have reached the 1500-hour mark (regardless of how well your lamp might appear to be working). You can’t check how much lamp life is left, and the replacement lamp doesn’t use a timer chip, however, you can reset the lamp hours every time you install a new lamp. This will let you know how many hours you have used the lamp and what the projector uses to determine when to switch out the lamp.

NEC has pre-determined that the hard cut-off point is 1600 hours. Once the projector counts 1600 hours (normal mode) on the lamp hour counter, it will auto shut off and it will not turn on until you reset the lamp timer. NEC wants you to replace the lamp at this stage to avoid the bulb from exploding. Most people will take out their existing lamp and keep it as a backup and test lamp only. At this time, you should buy a new lamp, install it, and then reset the lamp hour counter. The part number of the replacement lamp for the LT220, LT240, and LT260 is the NEC LT60LP or also known as Internal SKU#: MPLL08843.


How to check the lamp hours and remaining lamp time %

In the [Menu], scroll down and click the [Information] button. Then scroll down to [Page 3] and you will see the [Remaining Lamp Time%]. This will tell you how much lamp life is left, which is a percentage based on how many hours the lamp has been used. The [Lamp Hour Meter] is clearer.

When these series of projectors reach 0% for the remaining lamp time %, the indicator will switch to 100 Hours and count down. If you hit 0 hours in this countdown then the projector will no longer turn on, which means it’s time to replace your lamp. If the lamp was working well up until the point of shutdown, then you should keep that lamp and use it for testing or as a backup.
Once you have installed the new lamp, make sure the lamp access panel door is closed. The projector will not turn on unless the access panel door is closed.


How to reset the lamp hours

If you removed your old lamp prior to the 1600-hour mark on the lamp hour meter, then you can reset the lamp hour meter:


1. Turn on the projector.


2. Press the [Menu] button, in the menu window you will select [Projector Options], and then [Setup]. Scroll down to [Page 4] of the Setup and click [Clear Lamp Hour Meter].


3. A confirmation dialogue box will open, and you must now press [OK] to confirm.


*If you let the projector run past the 1600-hour mark, then your projector (NEC LT220, LT240, and LT260) will not turn on until you have performed the secret reset. You will need the original remote control to do this. On the remote, press and hold the [Help] button for 10 seconds (or longer) and the lamp clock will reset to zero. You will now be able to turn on the projector.

How to Choose the Right Projector for Gaming

When choosing a projector for gaming, there are several factors to consider. Here are some important ones to keep in mind:


  1. Resolution: The resolution of the projector is an important factor to consider, as it will affect the quality of the image displayed. For gaming, a minimum of 1080p resolution is recommended, although a 4K resolution would be ideal.
  2. Input lag: Input lag refers to the time it takes for the projector to process the signal from the gaming console or PC. The lower the input lag, the better the gaming experience will be. Look for projectors with input lag of 30 milliseconds or less.
  3. Brightness: The brightness of the projector is important, especially if you plan on gaming in a room with ambient light. Look for projectors with a brightness of at least 2,000 lumens.
  4. Contrast ratio: Contrast ratio refers to the difference between the darkest and brightest parts of an image. Higher contrast ratios will produce a more vivid and detailed image. Look for projectors with a contrast ratio of at least 10,000:1.
  5. Screen size and throw distance: Consider the size of the screen you want to project and the distance between the projector and the screen. Make sure the projector you choose can project an image that is the size you want from the distance you have available.
  6. Gaming-specific features: Some projectors come with gaming-specific features, such as low input lag modes, gaming presets, and frame interpolation. Look for projectors with these features if you want the best gaming experience.


Overall, when choosing a projector for gaming, you want to look for one with high resolution, low input lag, high brightness, high contrast ratio, and the ability to project an image the size you want from the distance you have available.

What is a Short-Throw Projector?

A short throw projector is a type of projector that can project a large image from a short distance away from the screen or wall. Typically, a short-throw projector can display an image with a diagonal size of 100 inches or more from a distance of just a few feet away. This makes it ideal for use in small or confined spaces where traditional projectors would require more room to project a large image. Short-throw projectors use specialized lenses to achieve this short projection distance, and they can be either mounted on the wall or placed on a table or stand. They are commonly used in home theaters, classrooms, and conference rooms.


Short-throw projectors are used by a wide range of individuals and organizations, including educators, businesses, and home theater enthusiasts.


In educational settings, short-throw projectors are often used in classrooms to display images, videos, and presentations. Because they can project a large image from a short distance away, they are ideal for small classrooms or lecture halls where space is limited.


In business settings, short-throw projectors are commonly used in conference rooms for presentations and meetings. They are also used in retail settings for digital signage and advertising displays.


Home theater enthusiasts also use short-throw projectors in their personal entertainment spaces. They can project a large image onto a wall or screen, creating a cinematic experience in a small space.


Short-throw projectors are space-saving, easy to install (require less space), easy to transport (smaller and lighter) and there is less likelihood of the projector casting shadows or glare on the screen.

The Difference Between LCD & DLP Projectors Versus Laser Projectors

LCD (Liquid Crystal Display) and DLP (Digital Light Processing) projectors are types of projectors that use traditional lamp-based technology. These projectors require metal-halide / UHP projector lamps. Laser projectors use lasers to produce their images. Each type of projector has its own strengths and weaknesses, so it’s difficult to say that one type is universally better than the others.


Here are some considerations to keep in mind when comparing LCD, DLP, and laser projectors:

  1. Image quality: All three types of projectors can produce high-quality images, but there may be differences in color accuracy, contrast, and brightness between them. Generally, laser projectors have better color accuracy, while LCD and DLP projectors may be brighter and higher contrast ratios.
  2. Durability: LCD and DLP projectors tend to be more durable than Laser projectors because the user can extend the life of the projector by purchasing a new lamp. Laser projectors tend to have longer lifespans than traditional lamp projectors.
  3. Maintenance: Traditional lamp-based projectors require more maintenance than laser projectors because the lamps need to be replaced periodically.
  4. Cost: Laser projectors tend to be more expensive than LCD and DLP projectors, although the cost of laser projectors has come down in recent years. Traditional lamp-based projectors are more affordable.
  5. Portability: LCD and DLP projectors tend to be more portable than laser projectors because they are smaller and lighter. Laser projectors are often larger and heavier, which can make them less suitable for portable use.


Consumers are often drawn to new technology, however, early adopters have left negative reviews; sighting less than average image quality and disappointing life expectancy. LED & Laser projectors were designed to be one-time-use only. The projectors were manufactured to last 20,000 hours and thereafter the entire projector would have to be replaced. The problem consumers encountered was that after the laser projector expired, they were displeased to learn that they had to buy another projector at a high price point ($5,000+).


There has been a resurgence in demand for LCD & DLP projectors that use UHP projector lamps.


Market trends indicate that end users prefer the ability to extend the life of their projectors by purchasing less expensive projector lamps. Consumers continue to use the same projector for over a decade with no diminishing return to image quality or performance.


Leading projector lamp manufacturers are investing capital to create and innovate technologies that will lead to amplified color projection and longer lifespan projector lamps. These investments indicate the future market for UHP projector lamps remains bullish. Therefore, the advantages of replacement UHP projector lamps from a price and quality prospective will remain attractive for the consumer.


Ultimately, the choice between LCD, DLP, and laser projectors depends on your specific needs and preferences. If you need high color accuracy and contrast, a laser projector may be the best choice. If you need a more affordable option that can be easily transported, an LCD or DLP projector may be a better fit.

The Color Issues With Your Projector Lamp and How to Solve Them

Written by Correy Pelletier


Projector lamps primarily affect brightness. They are made of white light, which has a rainbow of colors. If you are experiencing color issues, it’s most likely the bulb is not the cause of these color problems.


The most common color problem is a complete washing of one color, such as pink, blue, or red. This problem is typically caused by a faulty prism in the projector or in the lamp housing. The lamp inside the projector projects bright white light, which projects through a series of prisms or pieces of glass that are designed to allow certain types of light or colors to come through.


There can be many prisms in your projector. In some projectors, there is also a prism attached to the front of the lamp module.


These prisms will heat up over time and change properties. They can also get burned or discolored, which causes the washing over effect of one color.


One solution to the washing of one color is you can go to a repair shop so they can diagnose the problem and replace the prisms in your projector.


Another solution is to replace the front glass prism at the front of the lamp module. If you were not experiencing this problem with your old lamp, try reusing your old prism and swap out the prism along with the new lamp.


There can be other reasons your projector is experiencing color problems, there may be liquid-crystal display (LCD) issues or it’s a color wheel problem. And fixing the LCD or color wheel issues can be costly. Your best bet is to see if it’s the prism first since it’s the cheaper and quicker fix.


Expert Tip: BenQ and Optoma projectors are known to use a prism at the front of most of their lamps. If you are experiencing color issues, call MyProjectorLamps support:1-888-785-2677. We can guide you through the process, so you don’t have to spend money on a repair that doesn’t necessarily need to happen.

When Should You Replace Your Projector Lamp?

Written by Correy Pelletier


Is your projector not turning on? Have you tried unplugging it and/or turning on the switch?


What are the LED indicator lights telling you? Check your manual to see which combination of lights and colors align with which problem or what one of the colors means. For example, some Panasonic dual-lamp projectors like the PT-DZ780 series have four main indicator lights on the front of it, LAMP 1, LAMP 2, TEMP, and FILTER. If one of the lamp indicator lights is solid red, then it’s reaching the end of its life and must be replaced soon. A flashing red light means the bulb is burnt out and must be replaced immediately, so your projector can turn back on. An example of a single lamp projector is the Panasonic PT-VW350 which has LAMP and WARNING light indicators. If the lamp indicator is a solid red, then it’s time to replace the lamp. If the light is blinking red, then a problem is detected in the lamp or the lamp’s power supply. The warning indicator has three options of lighting up, solid red, blinking red, and slowly blinking red. If the indicator is blinking solid red, then the inside temperature is high. If the indicator is blinking red, then it means the inside temperature is high and the projector is on standby. And if the indicator is blinking red slowly, then there’s an anomaly detected in the projector and the projector cannot be turned on. These indications are common with most projectors. Dual-lamp projectors are rare, but single-lamp projectors are more common. 


If you still get an image on your screen, have you checked to see how many hours the lamp has been used? You can check this on the menu and if it’s more than 2500 hours, you have used it over the average number of hours.


Is your lamp dim? If it’s used for personal or professional use, you might want to replace lamps if they are dim. As you use it more and more, the dimmer the lamp will get. If the images or lamp seem dim, it’s time to replace it.


Are you having color issues? This is not a lamp problem, but a lamp prism problem. For more information, see our article on color issues.


When you were using your projector did you hear a popping noise and then it went black? This means the bulb has blown and you should replace it. Refer to our article on how to replace a lamp and how to deal with a blown bulb.


Check out our article on troubleshooting tips as it may help you get up and running if you just replaced the lamp and it won’t work.


If you cannot solve it yourself, then call us at 1-888-785-2677. Our friendly and knowledgeable customer service representatives can help diagnose the issue and go through the manual with you to determine the problem. We can also help you find the correct replacement lamp if the lamp needs replacing.